Well first off, you need some GI Joe bodies. You can also use body parts from other 3 3/4" figures that have similar construction to GI Joe including The CORPS!, Mego Buck Rogers, A-Team and also the slightly larger Sgt. Savage series with a little work. You can get almost any part you need by going to the usual places like flea markets. Also ebay is a good place with numerous Joes grouped in lots for a few dollars. I generally don't care how good or bad of shape the figure is in, if I need a part, I'll use it, I don't care anything about value. If your just starting out customizing, you should start may working with some worthless, piece of crap figures like Star Wars.
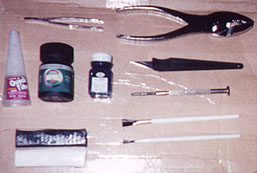
| The items to the right are what I use to make my customs, they are
as follows: Tweezers, pliers, X-acto knife, small Phillips screwdriver, various brushes, toothpicks, epoxy putty (which is also listed as Radiator Repair putty at Wal-Mart), and the ever trusty super glue. I mostly use Badger Precise Design Model Flex paint (large) which is water based acrylic and works great in the flat colors of black, "roof" brown, olive drab and gray primer. You can find the Badger paint at most hobby shops like Hobby Lobby. I also use Testors Flat paint (small) . The flats dry fast and work great around the joints and doesn't chip, plus gives a better look of cloth. Glossy paint looks best for parts like boots and belts or visors. |
|
|
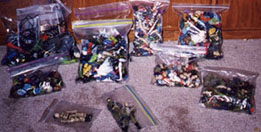
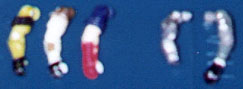
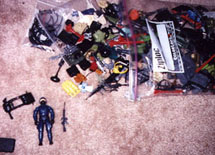
I keep all my body parts separated in individual bags of arms, heads, torsos, waist, legs and future ideas and "most used" parts. Keeping them like this will make it much easier to find the part your looking for. |
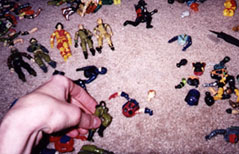
| Then I dump everything out onto the floor in their own separate piles, trying not to get the parts too messed up. |
|
|
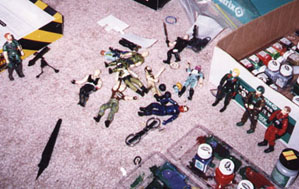
Then I just go through and decide what pieces work best together as far as function and looks. |
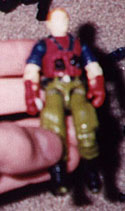
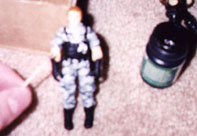
| Once I get an idea, I just make a loose assembly of the figure to make sure the parts go together and make sure there are no damaged parts or constrictions. |
|
|
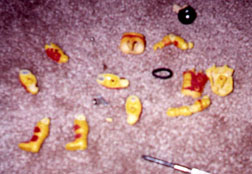
If you have arms with broken thumbs, don't throw them out, they can be repaired. I use epoxy putty which is available at most automotive stores to fix the broken thumb problem. I just knead the epoxy together and roll a small strip out and apply to the hand. The epoxy sets within generally 30 min and fully hardens in less than a day. Once it is dry, trim the excess using an x-acto and sand smooth. Wola, replaced thumb. Just be careful when putting an accessory in the repaired hand. I generally mold the putty with the accessory in the hand as normal. It can also be used to make hair, pouches and ammo clips and to also repair broke waists. Be sure to wash your hand after using epoxy. |
| I then clear an area and lay out my tools and paint and start to work. I just lay on the floor myself. |
|
|
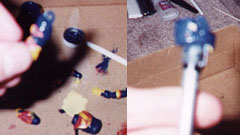
First you start by disassembling the entire figure, taking all three screws out of the back and each thigh. If the screws are tight or stuck, use pliers to grip the screwdriver and provide more leverage. If the screw is striped, try a slightly larger Philips head, or superglue the screwdriver head to the screw. If all this fails, your last resort maybe to just drill the screw out. |
Then start painting the figure first with the main color of the body and then go back over with the detailed parts. Some of parts like the waist are easier to paint if stick them on the end of a pencil, use tape to take up the slack. I generally don't use a base coat or primer, so do whichever you want. |
|
|
After the main parts are painted using a brush, I then add the fine details using a toothpick or needle. I also dull one of the toothpicks ends and use it to add the fine camo patterns to the figure. Just be careful when painting the eyes. |
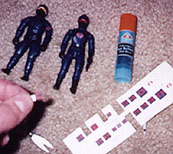
Once the figure is totally done being painted, I then add the COBRA symbols or patches to the figures. I just print some of the logos I scanned or downloaded out on my printer to the size I need, cut, and glue it to the figure using Elmer's glue sticks which dries clear and is water washable. |
 |
|
Once the figure is done with his paint job and decals, you can spray him with a clear coat, I prefer to use the flat version myself. Just add the appropriate accessories, create a filecard if you want and your done. Hope you enjoyed my crash course in custom creating. Once you get your figures done, be sure to tell me about em or you can swing by the EFCoH Submissions page and you may get to have your custom figures displayed at the Fourth Circle of Hell. Thanx. |